How to Stain a Wooden Table in Five Easy Steps
21 Jun
Part of a DIY project, such as a table, is the finishing. Doing this not only protects your table, but also brings out its natural colors and makes it much more appealing to have in any area in your home, whether it’s your living room or your dining area.
Here’s how you can stain your table in five easy steps:

1. Fill any exposed holes with plaster or putty. Part of preparing wood furniture is by sanding it first with coarse sandpaper, and then moving on to finer grit until the wood is smooth to the touch.
2. Allow the plaster dry before staining. Once the plaster or putty has fully dried, apply your wood stain of choice using a tack cloth and sweep it in one direction along the grain for smoother results.
Keep in mind that stain can either be water- or oil-based, though there are hybrid products that are available in your local hardware store.
On one hand, water stains are safer and don’t give off any dangerous fumes, but they tend to cause streaking if you’re not careful. On the other hand, oil stains are more user-friendly but they tend to be more difficult to clean and produce stronger fumes.

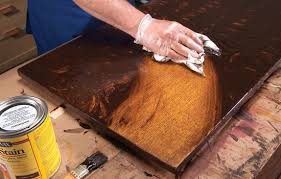
3. Wipe off the stain. Before the stain has fully dried, wipe off any excess and wait for five minutes. Wipe off in a circular motion using a line-free rag.
Repeat this with the other sections of the table to ensure a consistent color throughout your table and let it dry for eight hours of so. Once this is done, proceed to apply the first coat.
4. Apply the first clear coat. Once the stain has fully dried, it’s important to apply your finish in order to protect both the wood and the stain. There are different types of finish that you can use.
Two of the most commonly used finishes are polyurethane and tung oil because of their durability.
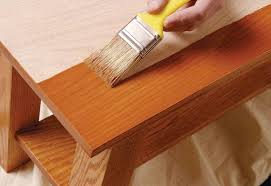
Apply the first clear coat using a brush and follow along the direction of the wood grain for even results. Wait for it to dry completely before proceeding to apply the second coat.

5. Wait to dry before applying the second coat. Apply the second coat in the same way as the previous coat – go along the grain in order to achieve a more even finish.
Having two coats not only protects the timber, but also allows the natural grain to shine better.
However, before applying the second coat, lightly sand every surface a fine-grit sand paper. Once done, proceed to apply the second coat for a greater luster and leave it to dry for six hours.

